This section gives hints and tips for creating and submitting print-ready files to Uniprint. If you prefer to download the information, we have created a PDF with all the below details.
- Sending Us Your File
-
We would ideally prefer PDF files.
We can accept Word, PowerPoint files, image files etc. but our printer system automatically transfers customers non-PDF files to PDF when sent to print. If there are any anomalies, the transfer may change your documents design, text etc. When making a PDF for print it is very important that you choose Press Quality in the options Menu. Many people mistakenly choose “high quality print,” which is inferior to press quality, resulting in lower quality images in your PDF file (high-quality print is for your desktop printer).
Please email your file to uniprint@abdn.ac.uk. If you require a quote prior to printing, please send us your file or give as much information as possible. We require quantity, number of pages, colour or black and white printing, single or double sided, how you would like your document finished e.g. smaller documents stapled/larger documents comb bound.
When sending documents with solid backgrounds requiring border-less printing/finish, your file should include crops and bleeds. - Crops and Bleeds
-
Crops or crop marks are a set of lines created by design software when the file is saved to a PDF. They are the cutting guides for our Print Room team. When used with bleeds these ensure no text etc. are lost at the trimming stage.
Bleed is the term used for the extended area of your artwork that goes beyond its actual size. For example, if you want a document to print all the way to the edges (without a white border) you require a bleed. We advise to create a document with a 3mm bleed on all sides.
Software which can create crops and bleeds are Adobe Photoshop, Illustrator, InDesign, CorelDRAW, QuarkXpress and Publisher. If you are working on a software which does not support crops and bleeds, please create your document 3mm wider and our team will import your file onto an InDesign file to create the crops required.
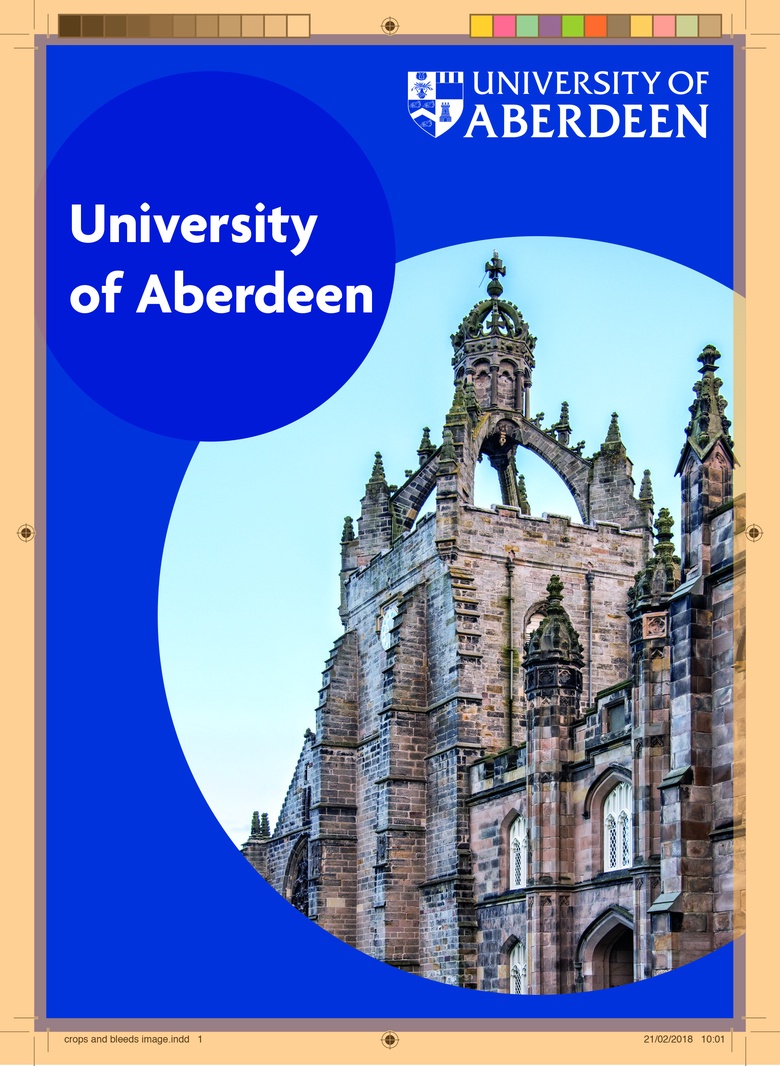
The image below demonstrates the crop and bleed setup. Any background colours, images, that you want to bleed need to extend past the document edges, (typically 3mm on all four sides). It is also important that your margins are correct: your text and other copy not be too close to the document edges (typically at least 5mm on all four sides).Please also ensure you leave a good margin on all edges. The document you are reading has 10mm margins on all edges.
The yellow area will be trimmed at our finishing stage of the printing process.
- Image/logo formats and resolution
-
A common source of problems encountered with work sent to us is the format of images and logos.
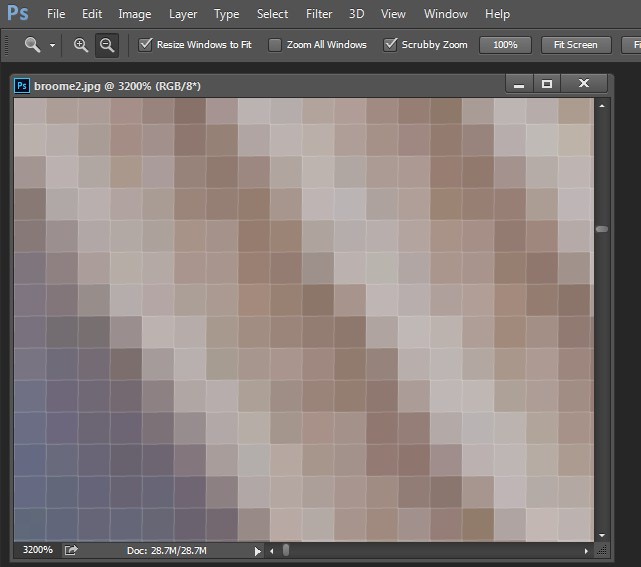
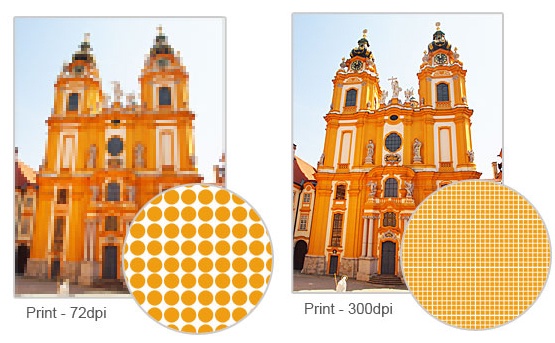
The main issue is the resolution of the original file. If the resolution is too small it will appear ‘blocky’ pixelated in the final print. Images from the internet are not suitable for printing as these images are 72dpi (dots per inch). The dpi value should be no less than 300 dpi.
A pixel can be only one colour, and a photograph is made up of a grid of thousands of pixels, each of varying colours that together make up your image. You can see these pixels if you zoom in until you see single blocks of colour (like below). Each of these are a pixel.
How do I know if my file size is ok for print?
Firstly, how do you check the size of your image? If you have a photo software this is quite simple but not everyone does.
Locate your file: -
On a pc: (Windows 10) Right click on the image, and select Properties, then on the top tabs choose Details, scroll down the window to ‘Image’. Here it will display the Pixel dimensions and also the Resolution
On a mac: Hold Apple + i (or command + i). This should pull up an info box. Under ‘More Info’ will be displayed the pixel dimensions. The resolution is not visible in this section.
Secondly, there is a bit of maths involved!If you want your image to appear on the cover of an A4 booklet say, you need a file that is minimum A4 size in dimensions, 11.7 x 8.3 inches and print at 300dpi (which is what our printers will print at. Make the below calculation: -
11.7 x 300 = 3510
8.3 x 300 = 2490So, your file needs to be a minimum 3510 x 2490 pixels in size.
The same calculation applies for all sizes of images.
If the image I want to use is only found from an internet source, can it still be used?
The answer is yes but the above calculation must be considered. Please be aware, an image that is A4 in size, 300dpi, will print at a higher quality than an A4 image at 72dpi. The more dot’s the higher the quality of the print (more sharpness and detail).
If using Google a handy tool to use is “show size”. When searching for images select ‘Tools’ > ‘More Tools’ > ‘Show Sizes’. The ‘pixel’ size will appear in the bottom left corner of each image. Only select the image which equals or is larger than the calculation previously created.
If you are at all unsure if your files will be suitable, please do not hesitate to contact us, uniprint@abdn.ac.uk
- Design Service
-
Our in-house team can assist with all aspects of design. Taking you through the initial design to print. Find more details here.